
Use this guide for any lesson built in Creator, whether you started from a blank lesson or used the AI Authoring agent (see Create a Lesson Using AI).
1. Open your lesson
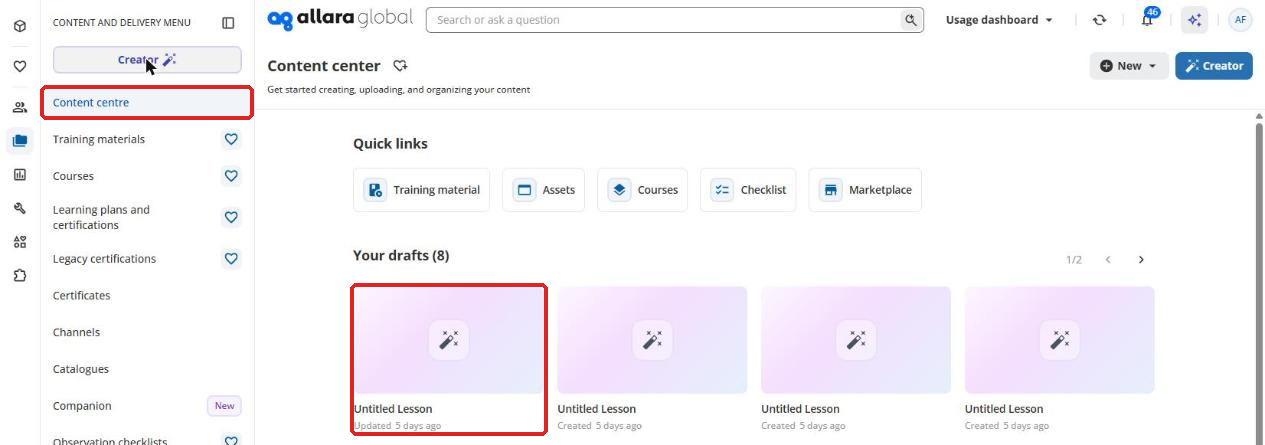
Go to Content centre and click the lesson under Your drafts. You can also go to Training materials, click ... next to the lesson and choose Edit.
2. Get to know the editor
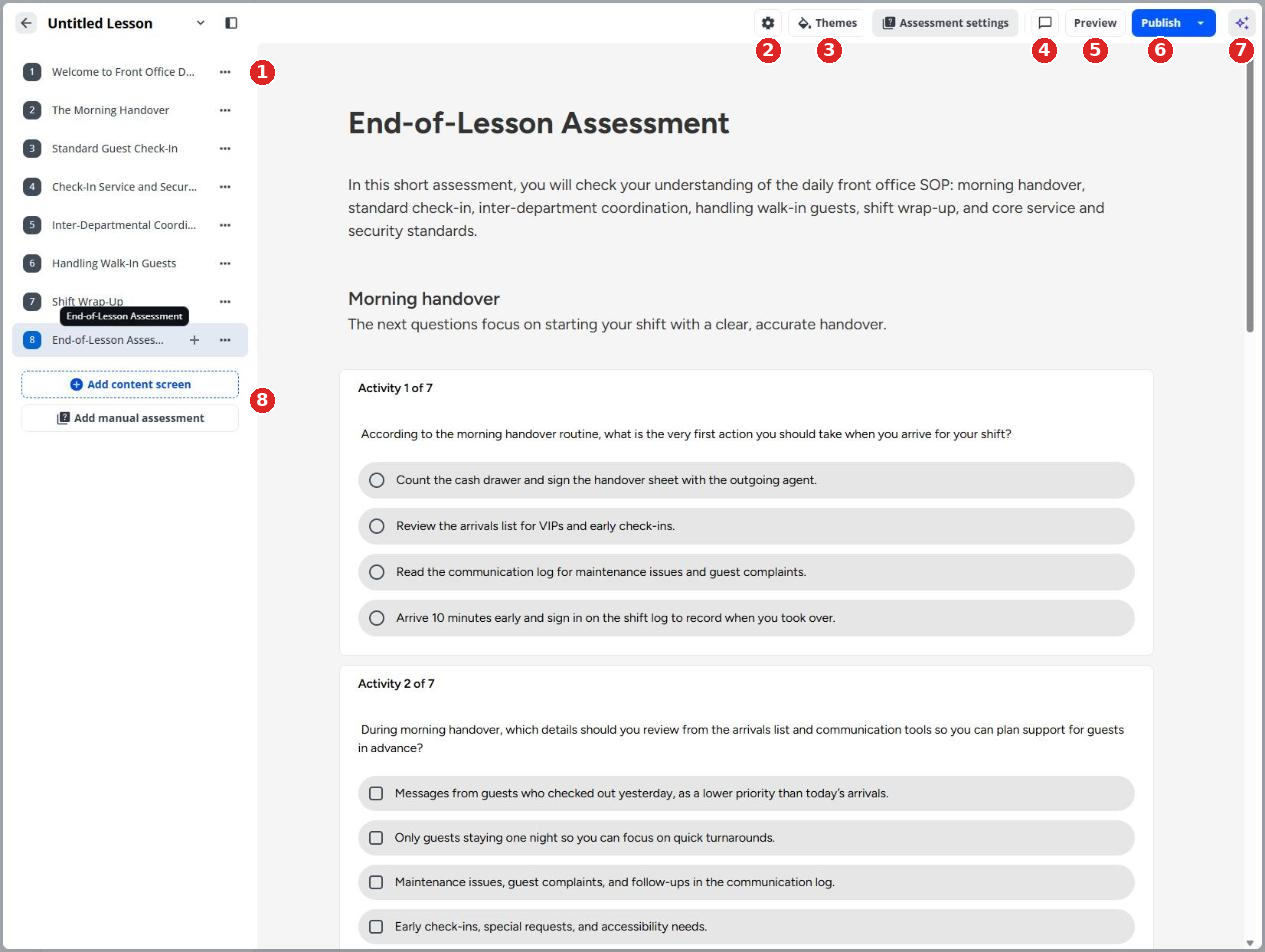
- Screens list: click a screen to edit it. Click ... for screen options.
- Lesson settings: language, narration and navigation.
- Themes: colours, fonts and logo.
- Comments: leave and reply to comments on the lesson.
- Preview: see the lesson as a learner.
- Publish: make the lesson available to add to courses.
- Authoring: open the AI agent to make changes by chatting.
- Add content screen and Add manual assessment.
On an assessment screen, Assessment settings also appears in the top bar.
3. Add a screen
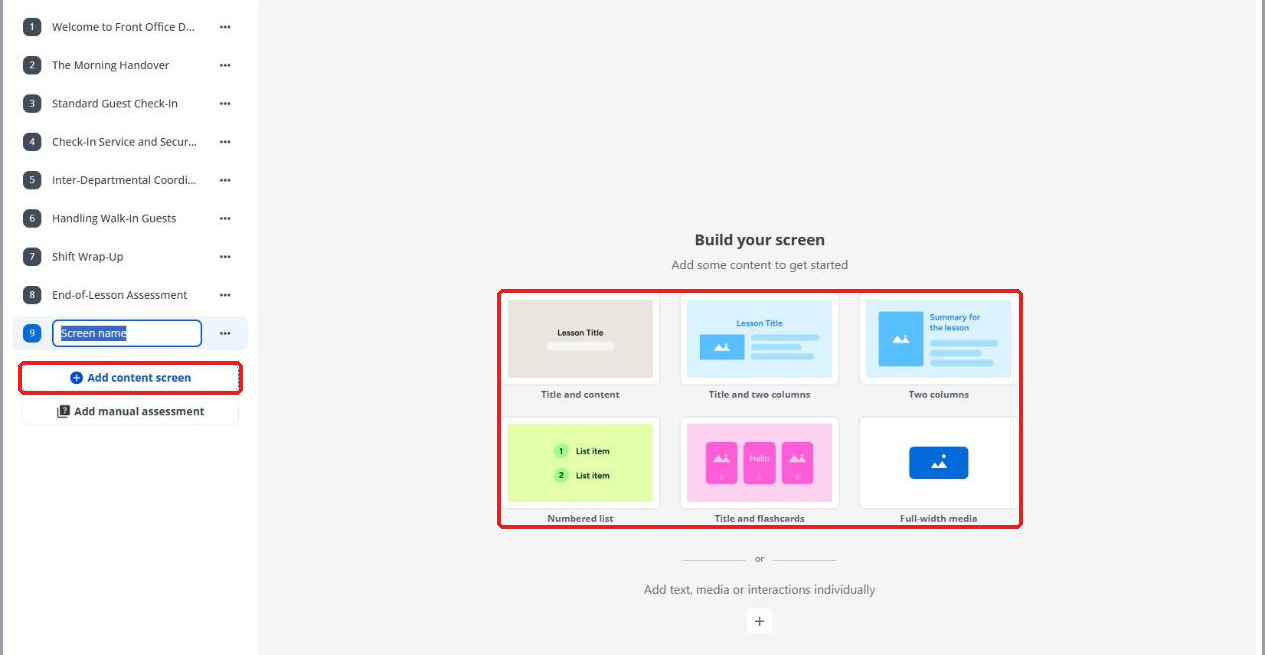
Click Add content screen, type a name for the screen and press Enter. Then pick a layout, or click + to add elements one at a time.
Layouts: Title and content, Title and two columns, Two columns, Numbered list, Title and flashcards, Full-width media.
4. Add content to a screen
Click + on an empty screen, or the + below any block, to open the element list. Search for an element or use the tabs.
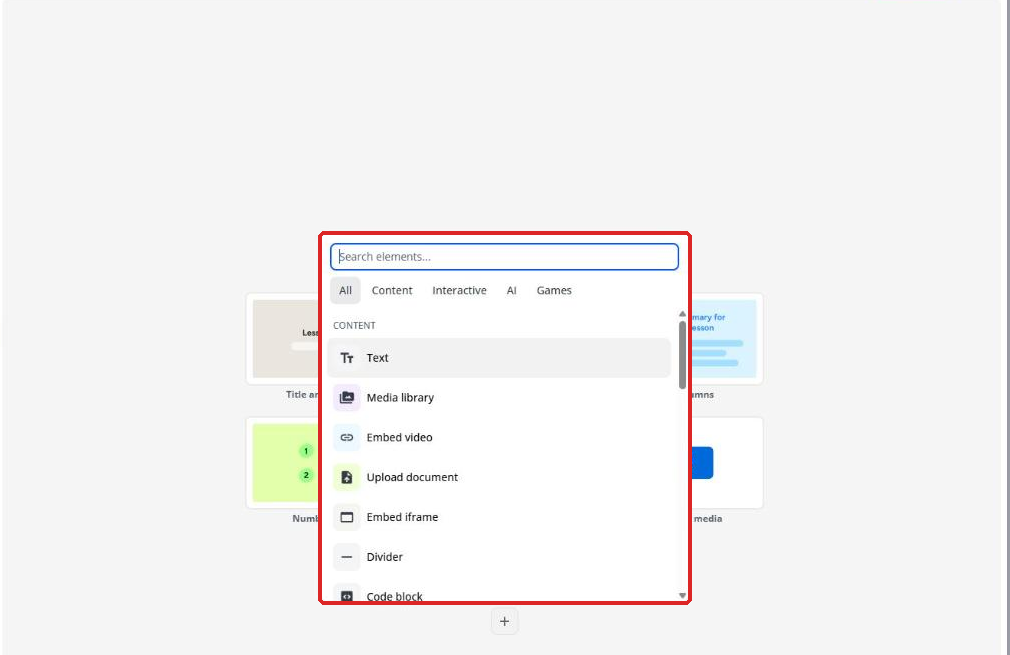
| Content | Text, Media library, Embed video, Upload document, Embed iframe, Divider, Code block, Table |
| Interactive | Single choice, Multiple choice, Fill in the blank, True or false, Matching pairs, Flashcards, Hotspots, Accordions, Tabs, Process |
| AI | AI roleplay |
| Games | Crosswords, Guess the word, Scenario, Sorting, Squares, True or false, Wording |
5. Edit text with AI
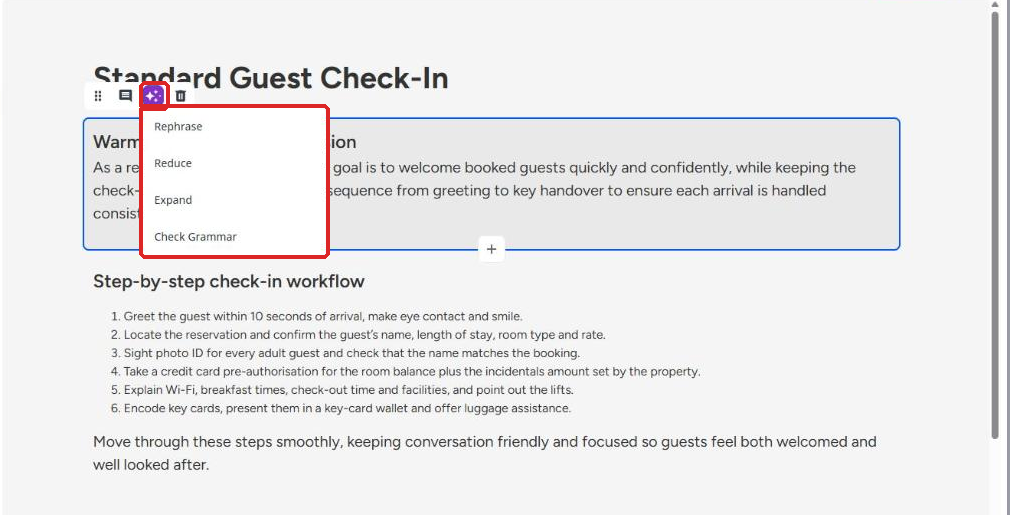
Click a text block to select it. In the small toolbar above it, click the sparkle icon and choose Rephrase, Reduce, Expand or Check Grammar.
The same toolbar lets you drag the block to move it, add a comment, or delete the block.
6. Manage screens
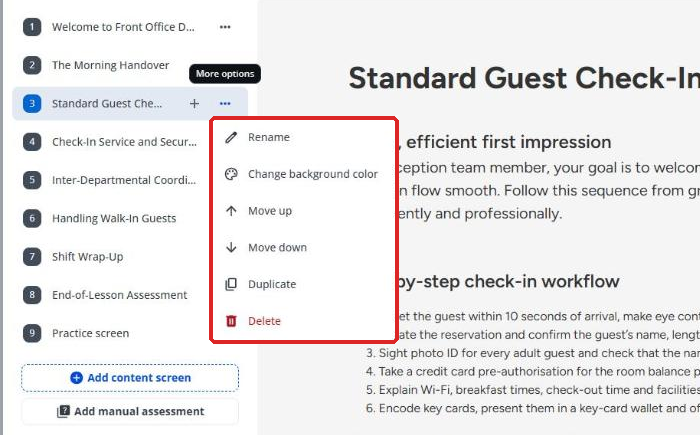
Click ... next to a screen to Rename, Change background color, Move up, Move down, Duplicate or Delete it.
7. Apply a theme
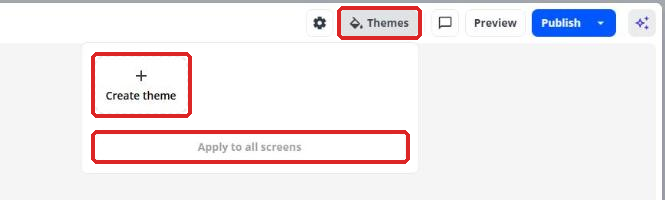
Click Themes. Choose a saved theme, or click Create theme. Click Apply to all screens to use it across the whole lesson.
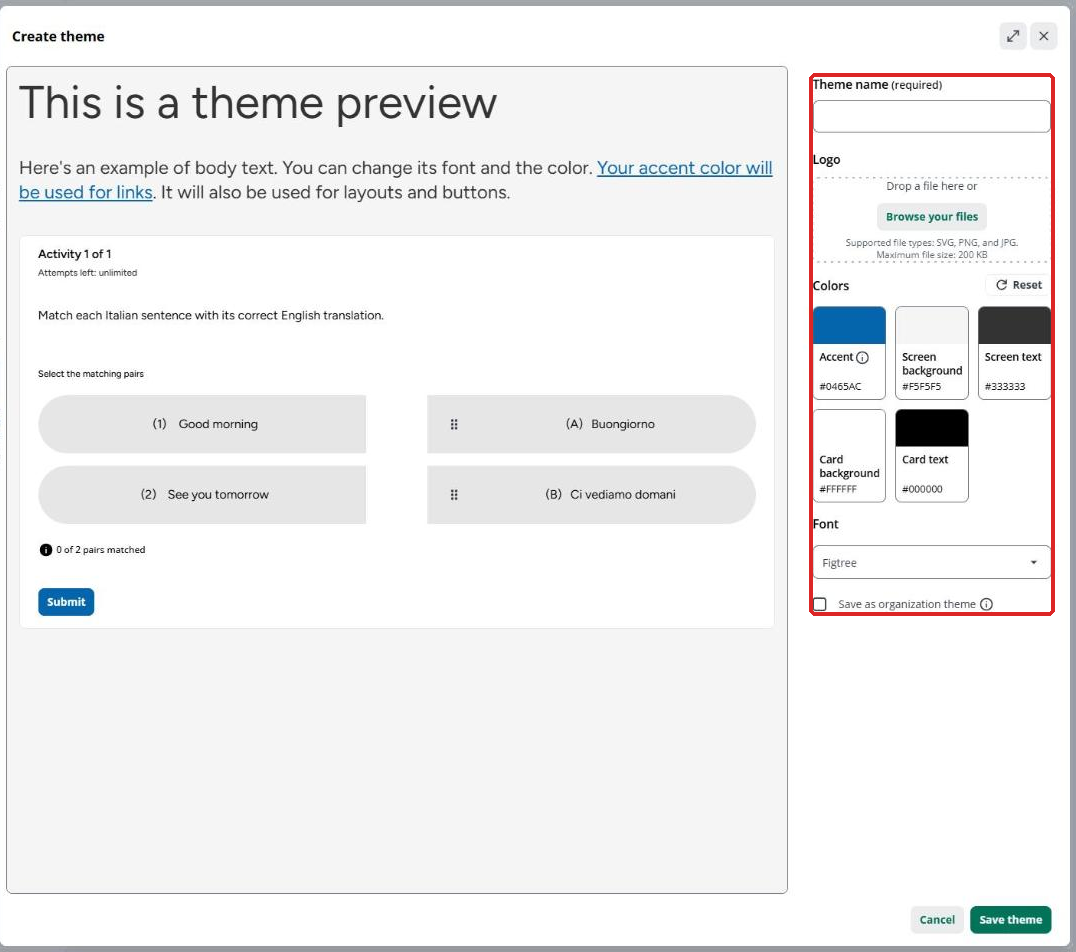
When creating a theme, set:
- Theme name (required)
- Logo: SVG, PNG or JPG, up to 200 KB
- Colors: Accent, Screen background, Screen text, Card background, Card text
- Font
Leave Save as organization theme unticked. If you tick it, everyone in the organisation can use the theme in Creator, and it can't be moved back to My themes. Then click Save theme.
8. Check lesson settings and preview
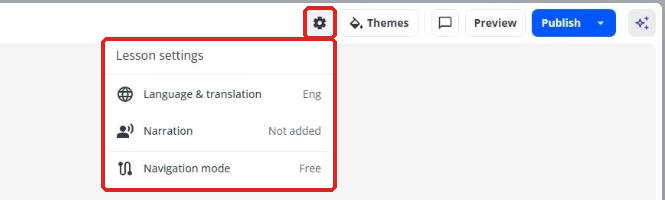
Click the gear icon to open Lesson settings:
- Language & translation
- Narration
- Navigation mode (Free by default)
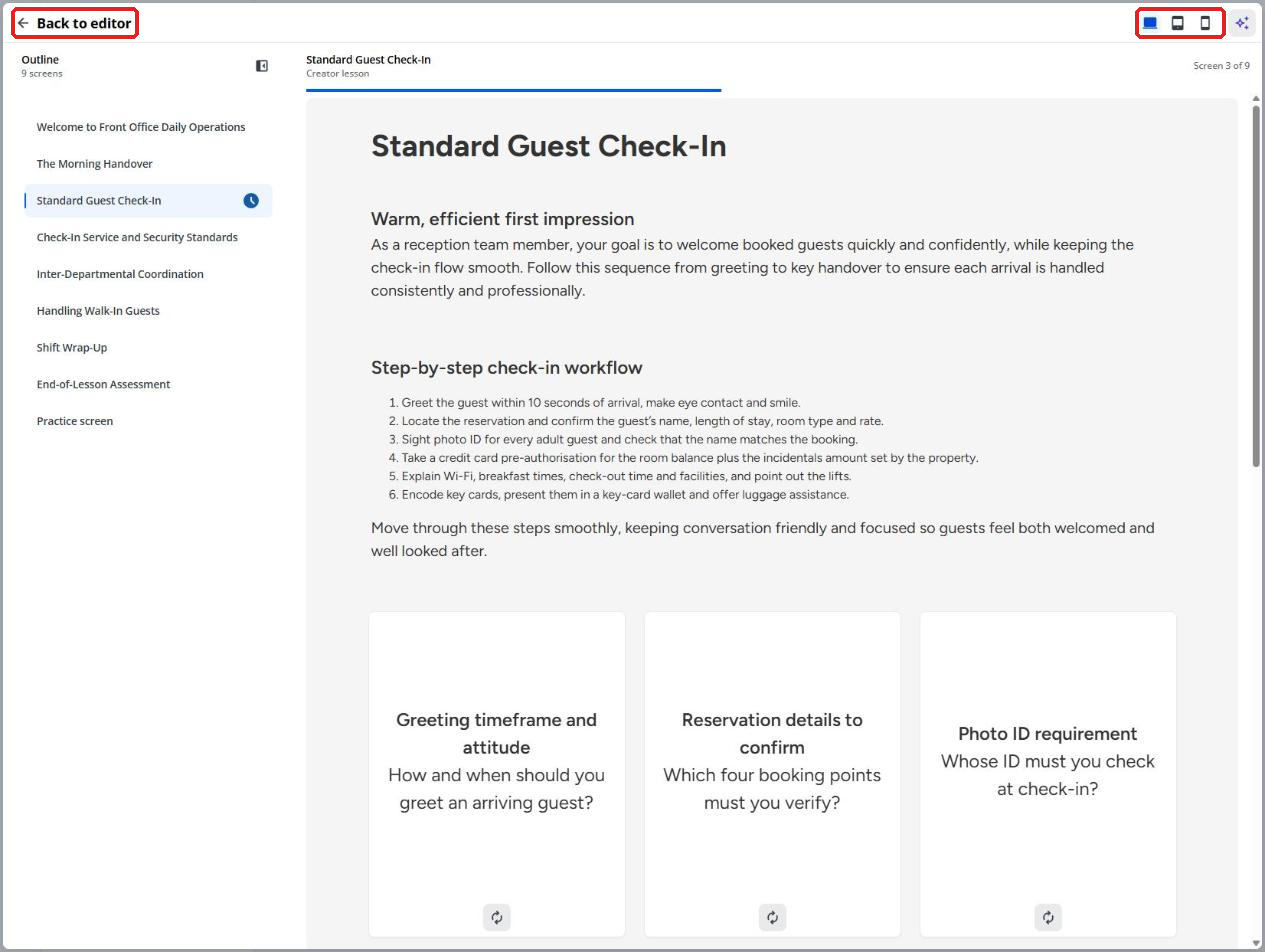
Click Preview to see the lesson as a learner would. Use the icons at the top right to switch between desktop, tablet and mobile. Click Back to editor when you're done.
9. Publish the lesson
When you've checked every screen, click Publish.

In the Publish Creator lesson? pop-up, click Publish again to confirm.
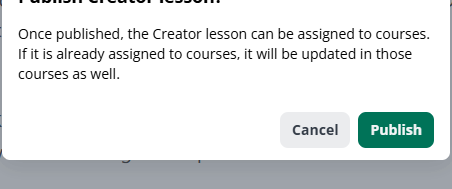
- A lesson must be published before you can add it to a course. Its status in Training materials changes from Draft to Active.
- If you change a lesson that's already in courses, publish it again to update it in those courses.
- To download the lesson as a SCORM package, click the arrow next to Publish and choose Export as SCORM.
10. Add the lesson to a course
Open the course and go to Training material > Add training material > Training material library, then select your lesson. Or go to Training materials, click ... next to the lesson and choose Assign to courses.